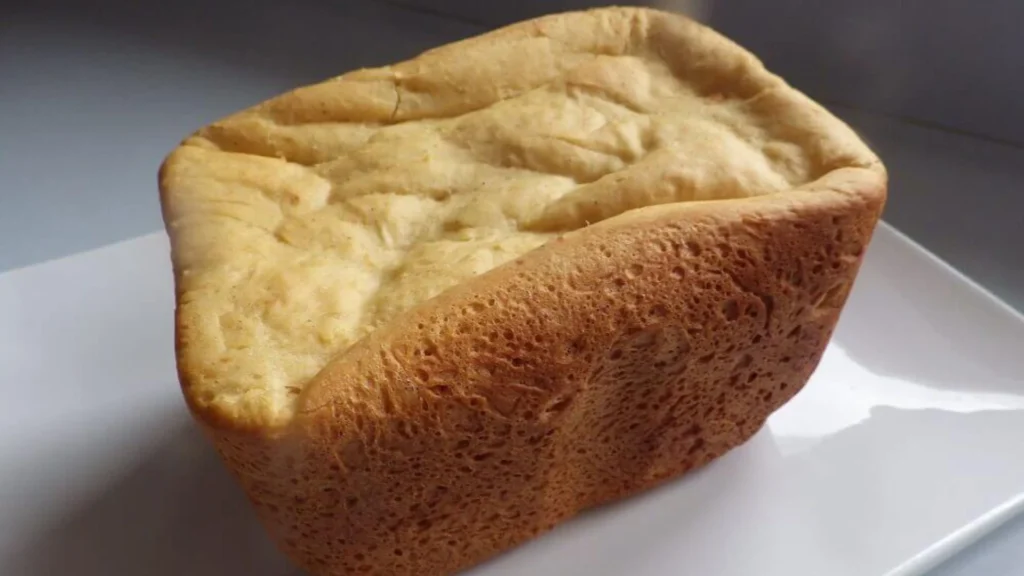
There’s something incredibly satisfying about homemade bread, especially when it comes infused with the rich, savory goodness of cheese.
Bread Machine Cheese Bread combines the convenience of a bread machine with the delectable flavors of your favorite cheeses, resulting in a loaf that’s both fluffy and aromatic.
This Bread Machine Cheese Bread is perfect for those who crave fresh-baked bread without the fuss of traditional methods. Enjoying it as a comforting side with soups, crafting delicious sandwiches, or simply indulging in a slice warm from the oven, this cheese bread is sure to elevate any meal.
Join me as I guide you through this simple yet rewarding baking adventure that will leave your kitchen smelling divine!
How To Prepare Bread Machine Cheese Bread?
Recipe Overview
Preparation Time: 15 minutes
Cooking Time: 3 hours (includes rising)
Total Time: 3 hours 15 minutes
Course: Bread
Cuisine: American
Calories: 160
Yield: 1 loaf (about 12 slices)
Kitchen Utensils
To make this delicious Cheese Bread, you will need:
- A bread machine
- Measuring cups and spoons
- A mixing spoon (optional)
- A cooling rack
Ingredients
- 1 cup warm water (110°F)
- 2 tablespoons olive oil
- 1 teaspoon sugar
- 1 teaspoon salt
- 3 cups bread flour
- 1 tablespoon active dry yeast
- 1 cup shredded cheese (cheddar, mozzarella, or a mix)
- 1 teaspoon garlic powder
- 1 teaspoon Italian herbs
How To Make Bread Machine Cheese Bread
Step 1: Add the Ingredients
Start by adding the warm water to the bread machine pan. Make sure the water is warm but not hot. Then, pour in the olive oil and sprinkle the sugar and salt on top.
Step 2: Incorporate the Flour
Next, gently add the bread flour over the liquid ingredients. Make sure to cover the liquid completely to avoid any clumping.
Step 3: Add the Yeast
Create a small well in the center of the flour and add the active dry yeast. This step is crucial because it helps the yeast activate properly without coming into contact with the liquid ingredients too soon.
Step 4: Add Cheese and Seasonings
Using garlic powder and Italian herbs, sprinkle them over the flour. Finally, add your shredded cheese, ensuring it’s evenly distributed over the top.
Step 5: Select the Settings
Close the lid of your bread machine and select the Basic or White Bread setting. Choose a medium crust color. Start the machine and let it do its magic.
Step 6: Monitor the Process
While your bread machine does the work, enjoy the delightful aroma filling your kitchen. You can check on the dough during the kneading phase to ensure it’s not too wet or dry. If it looks too sticky, add a little more flour; if it’s too dry, add a splash of water.
Step 7: Cool and Serve
Once the baking cycle is complete, carefully remove the pan from the machine. Let the bread cool in the pan for about 10 minutes before transferring it to a cooling rack. Allow it to cool completely before slicing. This helps the cheese set a bit, making for cleaner slices.
Special Note
Feel free to experiment with different types of cheese or even add herbs like rosemary or thyme to customize your Cheese Bread. For a kick, try incorporating jalapeños or sun-dried tomatoes!

Serving Information Of Bread Machine Cheese Bread
When it comes to serving Bread Machine Cheese Bread, the possibilities are endless! Slice it thick for hearty sandwiches filled with your favorite deli meats and veggies, or enjoy it warm with a pat of butter for a comforting snack.
Pair it with a bowl of soup or a fresh salad for a delightful lunch or dinner. You can also toast slices for a crunchy appetizer, topped with bruschetta or a sprinkle of garlic and herbs.
For a fun twist, serve it alongside a cheese platter, showcasing different cheeses to complement the flavors of your bread. Enjoy your creation in a variety of ways!
Tips And Tricks
1. Opt for cheeses that melt well, like cheddar or mozzarella. Shredded cheese ensures even distribution in the dough.
2. Use a kitchen scale for precise measurements. Accurate amounts of flour and water are crucial for the perfect texture.
3. Add wet ingredients first, then dry ingredients, and finally create a well for the yeast. This order helps with proper yeast activation.
4. Monitor the dough during mixing. It should be smooth and slightly sticky. Adjust with water or flour as needed.
5. Let the bread cool in the pan for 10 minutes, then transfer it to a rack. This prevents a gummy texture and helps with slicing.
Recipe FAQs
1. Can I use other types of flour?
Yes, you can substitute with whole wheat flour, but it may alter the texture. Start with a mix of half bread flour and half whole wheat for best results.
2. What’s the best way to store cheese bread?
Store it in an airtight container at room temperature for 2–3 days or freeze for up to 3 months.
3. Can I add extra ingredients like garlic or herbs?
Absolutely! Adding garlic powder, fresh herbs, or even chopped jalapeños can enhance the flavor.
4. Why did my bread come out too dense?
Bread can turn out dense if the yeast is old or if the dough was over-mixed. Fresh yeast and the right dough consistency are key.
5. Can I use pre-shredded cheese?
Yes, but freshly shredded cheese tends to melt better and has fewer additives, so it’s recommended for the best texture and flavor.
Conclusion
Making Bread Machine Cheese Bread is a delightful way to enhance your baking repertoire while enjoying the rich flavors of cheese.
This simple recipe transforms basic ingredients into a warm, fluffy loaf that’s perfect for any occasion. Whether you serve it alongside a hearty soup, make scrumptious sandwiches, or enjoy it toasted with a bit of butter, each slice promises to please.
The flexibility of the recipe allows you to experiment with different cheeses and seasonings, making it uniquely yours.
So, grab your bread machine and dive into this rewarding baking experience. You’ll soon discover that homemade cheese bread is a comforting staple you can’t resist!
Here Are Some Bread Recipes You Might Enjoy
Banana And Nutella Bread Recipe – Nutella Swirled
Banana And Date Bread Recipe || A Perfect Snack
Irresistible Bread Stuffed With Cheese Recipe
Blueberry Cream Cheese Sourdough Bread Recipe || Delightful Treat
Healthy Honey Oat Wheat Bread Recipe

Bread Machine Cheese Bread
Equipment
- A bread machine
- Measuring cups and spoons
- A mixing spoon (optional)
- A cooling rack
Ingredients
- 1 cup warm water 110°F
- 2 tablespoons olive oil
- 1 teaspoon sugar
- 1 teaspoon salt
- 3 cups bread flour
- 1 tablespoon active dry yeast
- 1 cup shredded cheese cheddar, mozzarella, or a mix
- 1 teaspoon garlic powder
- 1 teaspoon Italian herbs
Instructions
Step 1: Add the Ingredients
- Start by adding the warm water to the bread machine pan. Make sure the water is warm but not hot. Then, pour in the olive oil and sprinkle the sugar and salt on top.
Step 2: Incorporate the Flour
- Next, gently add the bread flour over the liquid ingredients. Make sure to cover the liquid completely to avoid any clumping.
Step 3: Add the Yeast
- Create a small well in the center of the flour and add the active dry yeast. This step is crucial because it helps the yeast activate properly without coming into contact with the liquid ingredients too soon.
Step 4: Add Cheese and Seasonings
- Using garlic powder and Italian herbs, sprinkle them over the flour. Finally, add your shredded cheese, ensuring it’s evenly distributed over the top.
Step 5: Select the Settings
- Close the lid of your bread machine and select the Basic or White Bread setting. Choose a medium crust color. Start the machine and let it do its magic.
Step 6: Monitor the Process
- While your bread machine does the work, enjoy the delightful aroma filling your kitchen. You can check on the dough during the kneading phase to ensure it’s not too wet or dry. If it looks too sticky, add a little more flour; if it’s too dry, add a splash of water.
Step 7: Cool and Serve
- Once the baking cycle is complete, carefully remove the pan from the machine. Let the bread cool in the pan for about 10 minutes before transferring it to a cooling rack. Allow it to cool completely before slicing. This helps the cheese set a bit, making for cleaner slices.