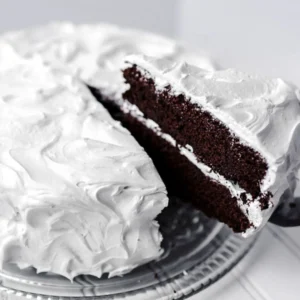
Chocolate cake with white icing is a classic dessert featuring rich, moist chocolate layers covered with creamy white frosting.
My experience in making this chocolate cake with white icing comes from watching the process and feeling inspired to recreate it at home.
The deep chocolate flavor contrasts beautifully with the smooth, sweet white icing, making it visually striking and delicious.
The main specialty lies in the balance of rich chocolate and light frosting, creating a delightful taste in every slice.
I will now guide through a detailed, step-by-step process to make this chocolate cake with white icing from scratch.
Why This Recipe Is A Must-Try?
This chocolate cake with white icing is a must-try because it delivers a perfect balance of rich, moist chocolate layers and smooth, sweet frosting.
The striking contrast between dark cake and creamy white icing makes it visually appealing and inviting. Each slice melts in the mouth, offering a decadent flavor that satisfies both chocolate lovers and those who enjoy a lighter, creamy finish.
The chocolate cake with white icing is approachable for bakers with some experience, yet impressive enough to serve at gatherings.
Chocolate cake with white icing texture, flavor, and presentation make this cake an unforgettable dessert worth making at least once.
Information Of Chocolate Cake With White Icing
Preparation Time: 15 minutes
Cooking Time: 40 minutes
Total Time: 55 minutes
Course: Dessert
Calories: 330
Cuisine: American
Yield: 8servings
Kitchen Utensils
- 2 large mixing bowls
- Whisk and spatula
- Electric mixer or stand mixer
- Measuring cups and spoons
- 9-inch round cake pans (2 pans depending on preference)
- Parchment paper
- Cooling rack
- Offset spatula or butter knife for frosting
Ingredients
For the chocolate cake:
- 1 ¼ cups unsweetened cocoa powder
- 2 large eggs + 1 large egg yolk
- 2 ½ cups all-purpose flour
- 2 ½ cups granulated sugar
- 2 ½ teaspoons baking soda
- 1 ¼ teaspoons baking powder
- ½ cup + 2 tablespoons vegetable oil
- 1 ¼ teaspoons salt
- 1 ¼ cups warm water
- 1 ¼ cups buttermilk
- 1 ½ teaspoons pure vanilla extract
For the white icing:
- 1 ½ cups (3 sticks) unsalted butter, at room temperature
- 4 tablespoons milk
- 6 cups powdered sugar (16 ounces plus 2 additional cups)
- 2 teaspoons vanilla extract
How To Make Chocolate Cake With White Icing
Step 1: Get the oven and pans ready
First, I’d preheat the oven to 350°F (175°C). While that’s warming up, I’d grease two 9-inch round cake pans really well, line the bottoms with parchment paper, and give them a light dusting of flour. That way, the cakes won’t stick when it’s time to remove them.
Step 2: Mix the dry stuff
In a big bowl, I’d whisk together the flour, cocoa powder, sugar, baking soda, baking powder, and salt. I like to make sure it’s evenly mixed so there are no clumps this helps the cake rise evenly.
Step 3: Mix the wet stuff
In another bowl, I’d beat the eggs, egg yolk, vegetable oil, buttermilk, warm water, and vanilla extract until everything is smooth and blended together.
Step 4: Bring them together
I’d slowly pour the wet mixture into the dry ingredients. Then I’d fold everything gently with a spatula or whisk, just until it’s combined. I try not to over mix because that can make the cake dense instead of light and fluffy.
Step 5: Fill the pans
I’d divide the batter evenly between the two pans and smooth the tops so they bake evenly.
Step 6: Bake
I’d pop them in the oven for 35–40 minutes. I usually check at 35 minutes with a toothpick; if it comes out clean, it’s done. Once baked, I’d let them cool in the pans for about 10 minutes.
Step 7: Cool completely
After that, I’d carefully lift the cakes out and place them on a cooling rack to cool completely before frosting. You don’t want warm cakes or the frosting will melt.
Step 8: Make the icing
For the white icing, I’d beat butter until creamy. Then I’d slowly add powdered sugar, a cup at a time, alternating with a little milk, and keep beating until it’s fluffy and smooth. A splash of vanilla goes in at the end.
Step 9: Assemble the cake
I’d place one cake layer on a plate or cake board and spread a thick, even layer of icing on top. Then the second layer goes on, and I’d cover the top and sides with the rest of the frosting.
Step 10: Decorate and chill
Finally, I’d decorate it however I like maybe sprinkles, chocolate shavings, or fruit and let it chill for 15–20 minutes to set the frosting. Then it’s ready to slice and enjoy!

Why My Recipe Works
My chocolate cake with white icing works because it carefully balances ingredients and techniques to create a moist, tender chocolate cake with smooth, creamy white icing.
The combination of warm water and buttermilk in the batter ensures the cake stays soft and light, while the proper use of baking soda and baking powder guarantees a perfect rise.
The white icing is whipped to the right consistency, making it easy to spread and giving the cake a luscious finish.
Following each step with attention to temperature and mixing produces a consistent result, delivering a cake that looks beautiful, slices easily, and tastes rich and flavorful every time.
Amazing Serving Ideas
Serve the chocolate cake with white icing in creative ways to impress family and guests. Cut slices into small squares for a dessert platter or serve as large wedges on individual plates with a dollop of whipped cream.
Add fresh berries or fruit slices on the side for a pop of color and freshness. Drizzle a little chocolate or caramel sauce over each slice for extra indulgence.
Sprinkle finely chopped nuts or chocolate shavings on top of the icing for texture and elegance. Pair with a scoop of vanilla ice cream or a cup of hot coffee for a complete, decadent treat.
Delicious Variations
1. Chocolate Ganache Frosting:
Swap the white icing for a rich, glossy chocolate ganache. Simply heat heavy cream and pour it over chopped dark chocolate, then let it set to the desired consistency. Pour it over the cake for a decadent, shiny finish.
2. Mocha Flavor:
Add a teaspoon of instant coffee or espresso powder to the cake batter to enhance the chocolate flavor with a subtle coffee kick. The white icing will beautifully balance the richness.
3. Peanut Butter Filling:
Add a creamy peanut butter layer between the cake and icing. Peanut butter pairs wonderfully with chocolate and adds a savory-sweet element.
4. Strawberry or Raspberry Swirl:
Add fresh fruit or fruit preserves to the white icing for a fruity swirl effect. It adds a burst of flavor and a pop of color to the cake.
5. Coconut Shredded Topping:
After icing the cake with white frosting, sprinkle sweetened shredded coconut on top for texture and flavor. The coconut gives a tropical twist and looks beautiful against the white icing.
Quick Kitchen Tips
1. Use warm water or milk when the recipe calls for it. This helps cocoa or chocolate dissolve fully and keeps the batter smooth.
2. Sifting flour, cocoa, and powdered sugar removes lumps and aerates the mixture, giving a lighter, fluffier cake.
3. Lightly grease pans and sprinkle with flour or cocoa to prevent sticking if you don’t use parchment.
4. Stir wet and dry ingredients together just until combined. Over mixing can make the cake tough.
5. If your oven has hot spots, turn the cake pans halfway through baking for even color and texture.
6. Use a serrated knife to level tops before frosting. This gives a professional, even look to the finished cake.
Additions
Enhance this chocolate cake with white icing by adding extra touches for flavor and presentation. Sprinkle toasted nuts, such as almonds or pecans, on top of the frosting for a subtle crunch.
Fresh berries like strawberries or raspberries add a natural sweetness and a pop of color. Shaved white or dark chocolate can be layered over the icing for an elegant look.
For a richer taste, drizzle a thin layer of chocolate ganache between the cake layers before frosting. A light dusting of cocoa powder or powdered sugar on top can also make the cake visually stunning.
Storage Instructions
Keep the chocolate cake with white icing in an airtight container at room temperature for up to 2–3 days. If storing longer, place the cake in the refrigerator, covered tightly with plastic wrap or in a cake keeper, for up to 5 days.
Before serving, allow refrigerated chocolate cake with white icing to sit at room temperature for 20–30 minutes to soften the frosting and bring out the flavors.
For longer storage, the chocolate cake with white icing layers can be wrapped separately in plastic wrap and frozen for up to 2 months. Thaw frozen layers in the refrigerator or at room temperature before frosting.
FAQs Chocolate Cake with White Icing
Can I make this cake ahead of time?
Yes, the chocolate cake can be baked a day in advance. Store it covered at room temperature or in the refrigerator and frost it just before serving for the best texture.
Can I use a different frosting?
Absolutely. Cream cheese frosting, whipped cream, or white chocolate ganache can be used instead of the classic buttercream.
How do I keep the cake moist?
Use room temperature ingredients, avoid over mixing, and ensure not to over bake. Brushing a little simple syrup on the layers can also help.
Can I freeze this cake?
Yes, wrap the cooled cake tightly in plastic wrap and foil. Freeze for up to 2 months. Thaw overnight in the refrigerator before frosting.
Why is my frosting too soft?
Soft frosting can happen if the butter is too warm or the cake is still slightly warm. Chill the frosting for 10–15 minutes or use slightly cooler butter for stability.
Conclusion
This chocolate cake with white icing is a delicious and delightful recipe that everyone loves. Every time I make it, it brings joy and satisfaction, whether for family, friends, or special occasions.
The rich chocolate layers paired with creamy white frosting create a treat that looks as good as it tastes. I have shared my easy, step-by-step method so that anyone can recreate it at home.
Each time I serve it, it’s enjoyed and appreciated, and I hope you will try this chocolate cake with white icing and experience the same happiness and delicious results.
More Delicious Recipes For You
Italian – Durum Wheat Bread Recipe
French Whole Wheat Bread Recipe || Best Here’s
Hard Red Wheat Bread Recipe || Health Benefits
Popular Jalapeño Cheese Bread Recipe
Brazilian Cheese Bread Recipe Blender
Lava Cake Vanilla – Molten Version
Chocolate Cake With White Icing
Equipment
- 2 large mixing bowls
- Whisk and spatula
- Electric mixer or stand mixer
- Measuring cups and spoons
- 9-inch round cake pans (2 pans depending on preference)
- parchment paper,
- Cooling rack
- Offset spatula or butter knife (for frosting)
Ingredients
For the chocolate cake:
- 1 ¼ cups unsweetened cocoa powder
- 2 large eggs + 1 large egg yolk
- 2 ½ cups all-purpose flour
- 2 ½ cups granulated sugar
- 2 ½ teaspoons baking soda
- 1 ¼ teaspoons baking powder
- ½ cup + 2 tablespoons vegetable oil
- 1 ¼ teaspoons salt
- 1 ¼ cups warm water
- 1 ¼ cups buttermilk
- 1 ½ teaspoons pure vanilla extract
For the white icing:
- 1 ½ cups 3 sticks unsalted butter, at room temperature
- 4 tablespoons milk
- 6 cups powdered sugar 16 ounces plus 2 additional cups
- 2 teaspoons vanilla extract
Instructions
Step 1: Get the oven and pans ready
- First, I’d preheat the oven to 350°F (175°C). While that’s warming up, I’d grease two 9-inch round cake pans really well, line the bottoms with parchment paper, and give them a light dusting of flour. That way, the cakes won’t stick when it’s time to remove them.
Step 2: Mix the dry stuff
- In a big bowl, I’d whisk together the flour, cocoa powder, sugar, baking soda, baking powder, and salt. I like to make sure it’s evenly mixed so there are no clumps this helps the cake rise evenly.
Step 3: Mix the wet stuff
- In another bowl, I’d beat the eggs, egg yolk, vegetable oil, buttermilk, warm water, and vanilla extract until everything is smooth and blended together.
Step 4: Bring them together
- I’d slowly pour the wet mixture into the dry ingredients. Then I’d fold everything gently with a spatula or whisk, just until it’s combined. I try not to over mix because that can make the cake dense instead of light and fluffy.
Step 5: Fill the pans
- I’d divide the batter evenly between the two pans and smooth the tops so they bake evenly.
Step 6: Bake
- I’d pop them in the oven for 35–40 minutes. I usually check at 35 minutes with a toothpick; if it comes out clean, it’s done. Once baked, I’d let them cool in the pans for about 10 minutes.
Step 7: Cool completely
- After that, I’d carefully lift the cakes out and place them on a cooling rack to cool completely before frosting. You don’t want warm cakes or the frosting will melt.
Step 8: Make the icing
- For the white icing, I’d beat butter until creamy. Then I’d slowly add powdered sugar, a cup at a time, alternating with a little milk, and keep beating until it’s fluffy and smooth. A splash of vanilla goes in at the end.
Step 9: Assemble the cake
- I’d place one cake layer on a plate or cake board and spread a thick, even layer of icing on top. Then the second layer goes on, and I’d cover the top and sides with the rest of the frosting.
Step 10: Decorate and chill
- Finally, I’d decorate it however I like maybe sprinkles, chocolate shavings, or fruit and let it chill for 15–20 minutes to set the frosting. Then it’s ready to slice and enjoy!