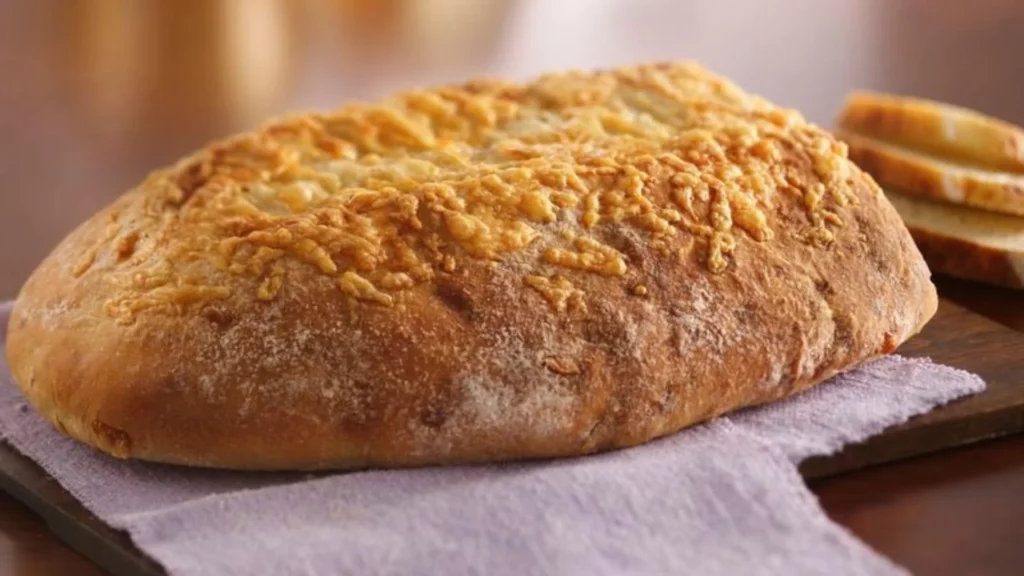
After making the Asiago Cheese Bread Machine Recipe for the first time, my family couldn’t wait to dig in. The warm, golden crust and the savory aroma filled the kitchen, creating a sense of excitement.
Everyone eagerly sliced through the soft, cheese-filled loaf. We enjoyed it fresh, paired with butter for an extra indulgence.
Some used it as a base for sandwiches, while others just savored it on its own. It was the perfect complement to a hearty bowl of soup, adding a rich, cheesy flavor.
The kids loved the melty Asiago, and even the pickiest eaters kept coming back for more. It quickly became a family favorite, especially for cozy dinners.
Let’s explore how to make this easy and delectable bread right in your own kitchen!
How To Prepare Asiago Cheese Bread Machine Recipe?
Recipe Overview
- Preparation Time: 10 minutes
- Cooking Time: 3 hours (depending on your bread machine cycle)
- Total Time: 3 hours 10 minutes
- Course: Bread
- Difficulty: Easy
- Cuisine: Italian-American
- Calories: Approx. 220 calories per slice (based on 12 slices)
- Yield: 1 loaf (approximately 12 slices)

Kitchen Utensils
- Bread machine
- Measuring cups and spoons
- Mixing spoon (optional for adding ingredients)
- Knife for slicing
Ingredients
- 3 1/4 cups bread flour
- 1 cup warm water (110°F/45°C)
- 1 cup shredded Asiago cheese
- 2 tablespoons salted butter, softened
- 2 tablespoons olive oil
- 1 tablespoon white sugar
- 1 1/2 teaspoons salt
- 1 1/2 teaspoons active dry yeast
- 1 teaspoon minced garlic
Instructions
1. Prepare the Bread Machine:
Begin by adding the wet ingredients into the bread machine pan. Pour in the warm water, olive oil, and melted butter. The water should be around 110°F (45°C) to activate the yeast properly.
2. Add Dry Ingredients:
Next, add the bread flour, sugar, salt, and minced garlic. Make sure the ingredients are evenly distributed, and do not stir them. You want to keep the dry ingredients separate from the yeast for now.
3. Activate the Yeast:
Make a small well in the dry ingredients (on top of the flour) and add the active dry yeast into the well. This prevents the yeast from touching the wet ingredients too early.
4. Start the Bread Machine:
Place the bread pan into the bread machine. Set the machine to the “Basic” or “White Bread” setting, which typically takes around 3 hours. Make sure the crust setting is to your preference (light, medium, or dark).
5. Add Cheese:
When the bread machine beeps (usually during the last 5–10 minutes of kneading), add in the shredded Asiago cheese. This ensures it doesn’t melt and disappear during the first kneading cycle.
6. Baking:
Allow the machine to complete the cycle, which includes kneading, rising, and baking the bread. Once the bread machine completes the cycle, carefully remove the pan and let the bread cool for a few minutes before transferring it to a wire rack to cool completely.
7. Slice and Serve:
Once cooled, slice your Asiago cheese bread and serve. Enjoy with a bowl of soup, a salad, or as a delicious snack.
Serving Suggestions For Asiago Cheese Bread
1. Classic Tomato Soup
Pair a slice of Asiago cheese bread with a bowl of creamy tomato soup. The bread’s savory cheese complements the tangy tomato base, making it a comforting and satisfying combination. For an extra touch, sprinkle some additional Asiago cheese on top of the soup before serving.
2. Mediterranean Sandwich
Transform your Asiago cheese bread into a delicious Mediterranean sandwich. Layer slices of roasted red peppers, olives, cucumbers, and a spread of hummus.
Add a few fresh basil leaves or a sprinkle of feta cheese for added flavor. This sandwich is perfect for a light lunch or a flavorful snack.
3. Garlic Bread
Turn your Asiago cheese bread into a garlic bread delight. Slice the bread and brush each piece with a mixture of melted butter, minced garlic, and a pinch of parsley. Toast the slices in the oven until crispy and golden. This makes a fantastic side for pasta dishes or salads.
4. Breakfast Toast
Enjoy Asiago cheese bread as a hearty breakfast option. Toast a slice and top it with avocado slices, a sprinkle of red pepper flakes, and a drizzle of olive oil. You can also add a poached egg on top for a more filling and nutritious breakfast.
5. Cheese and Charcuterie Board
Incorporate Asiago cheese bread into a cheese and charcuterie board. Its rich, cheesy flavor pairs well with a variety of cheeses, cured meats, olives, and pickles.
Arrange the bread alongside other accompaniments for a sophisticated appetizer or party platter.
Health Benefits Of Enjoying Asiago Cheese Bread
1. Rich in Protein: Asiago cheese is a good source of protein, which is essential for muscle repair and growth. Protein also supports a healthy immune system and helps keep you feeling full longer, making it easier to maintain a balanced diet.
2. Provides Essential Minerals: Asiago cheese is rich in essential minerals such as calcium and phosphorus.
Calcium is crucial for maintaining strong bones and teeth, while phosphorus plays a key role in energy production and cell repair. Including Asiago cheese bread in your diet can contribute to meeting your daily mineral needs.
3. Supports Digestive Health: If you use whole wheat flour or add extra fiber to your Asiago cheese bread, it can be beneficial for digestive health.
Dietary fiber promotes regular bowel movements, helps prevent constipation, and supports a healthy gut microbiome. Fiber also aids in regulating blood sugar levels.
4. Boosts Energy Levels: The combination of complex carbohydrates from the bread and protein from the cheese provides a steady release of energy.
This makes Asiago cheese bread a good choice for a balanced meal or snack that can help sustain your energy levels throughout the day.
5. Rich in Vitamins: Asiago cheese provides important vitamins such as Vitamin A and Vitamin B12. Vitamin A supports healthy vision, immune function, and skin health, while Vitamin B12 is essential for nerve function and red blood cell formation. Including Asiago cheese bread in your diet can help you get these vital nutrients.
How To Store
To store Asiago Cheese Bread Machine Recipe, keep it at room temperature in an airtight container or resealable plastic bag for up to 3 days.
For longer storage, wrap the bread tightly in plastic wrap or aluminum foil and place it in a resealable freezer bag before freezing.
This method preserves the bread’s freshness and prevents freezer burn. When ready to use, simply thaw the bread at room temperature or lightly toast it to restore its texture.
Conclusion
The Asiago Cheese Bread Machine Recipe made in the bread machine is a delightful and easy-to-make recipe that brings a burst of flavor to any meal.
Asiago Cheese Bread Machine Recipe soft, cheesy interior and crisp, golden crust make it an irresistible treat for the whole family.
Whether enjoyed with butter, as part of a sandwich, or alongside a warm soup, it’s a versatile bread that quickly becomes a favorite in any household.
The simplicity of the bread machine process ensures that even beginners can enjoy the delicious results. Once you try it, you’ll find yourself making this savory loaf again and again.
Your Amazing Delicious Iteam
7 Grain Wheat Bread – Hearty Delight
Chocolate Zucchini Bundt Cake – Taste Of Home
Vanilla Mug Cake Recipe – In 2 Minutes
Coffee And Chocolate Cake Recipe
Vanilla Sponge Cake Recipe – Soft & Easy

Asiago Cheese Bread Machine Recipe
Equipment
- Bread machine,
- Measuring cups and spoons
- Mixing bowl
- knife
Ingredients
- 1 cup warm water 110°F/45°C
- 2 tbsp olive oil
- 1 tbsp sugar
- 1 1/2 tsp salt
- 3 cups bread flour
- 1 1/2 tsp active dry yeast
- 1 cup grated Asiago cheese
- 1/4 cup finely chopped fresh rosemary optional for extra flavor
Instructions
Prepare the Bread Machine
- First, add the warm water to the bread machine pan. Ensure that the water isn’t too hot, as it can kill the yeast. Sprinkle the sugar over the water and let it dissolve for a minute.
Add Dry Ingredients
- Next, add the bread flour, salt, and active dry yeast to the pan. I recommend adding the yeast after the flour to prevent direct contact with the salt, which can hinder yeast activation.
Add Wet Ingredients
- Drizzle the olive oil over the flour mixture. If you’re using fresh rosemary, sprinkle it in at this stage. The rosemary adds a lovely herbal note to the bread.
Start the Bread Machine
- Set your bread machine to the “Basic” or “White Bread” setting. Select the desired crust color if your machine offers options. Start the machine, and it will mix, knead, rise, and bake the bread.
Add Cheese
- When the machine beeps or indicates that it’s time to add mix-ins, carefully add the grated Asiago cheese. The bread machine will incorporate the cheese during the kneading process.
Cool and Enjoy
- Once the baking cycle is complete, carefully remove the loaf from the pan and let it cool on a wire rack before slicing.