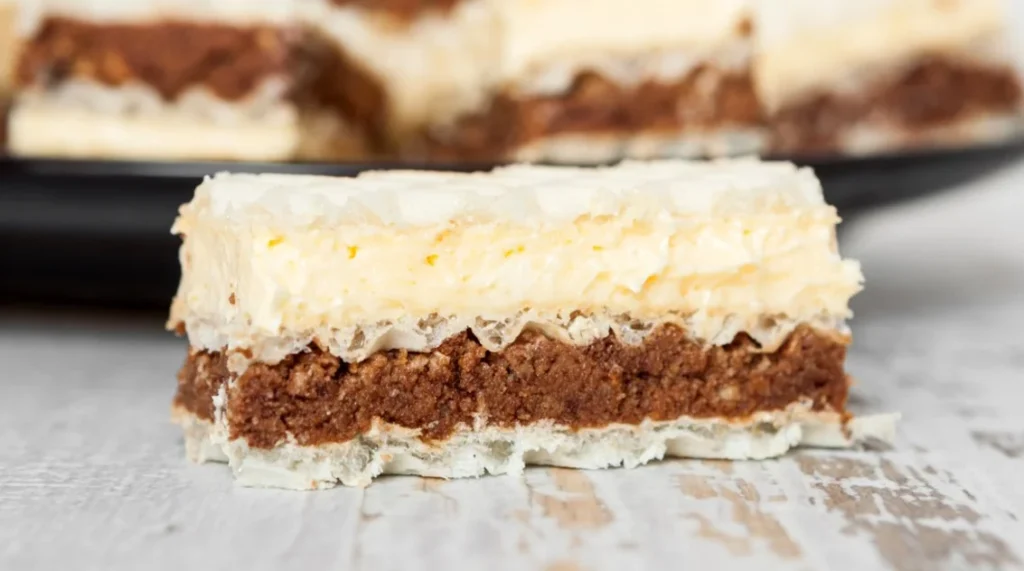
If you’re looking for a dessert that’s both simple and absolutely delicious, you’ve come to the right place. One of my all-time favorites is the classic Vanilla Wafer Icebox Cake.
This no-bake treat is perfect for hot days or when I’m craving something sweet but don’t want to turn on the oven.
The layers of vanilla wafers, whipped cream, and a hint of vanilla make it a perfect balance of texture and flavor.
What I love most is how easy it is to put together. Just a few ingredients, and you’re all set to create something that will wow everyone.
Trust me, once you try this Vanilla Wafer Icebox Cake, you’ll be hooked!
Why You’ll Love This Vanilla Wafer Icebox Cake
✔ No Baking Required: You don’t need an oven to make this delicious dessert! Perfect for hot summer days or when you’re short on time.
✔ Simple Ingredients: The recipe uses everyday ingredients that you likely already have in your pantry and fridge.
✔ Customizable: You can tweak the recipe to your preferences—add fruit, change the flavor of the filling, or use a different type of cookie.
✔ Make-Ahead Friendly: This dessert can be made the day before and kept in the fridge, making it an excellent choice for meal prepping or preparing for a special occasion.
How To Prepare Vanilla Wafer Icebox Cake?
Recipe Overview
Preparation Time: 20 minutes
Cooking Time: 0 minutes
Total Time: 4 hours (includes chilling time)
Course: Dessert
Cuisine: American
Yield: 10 servings
Kitchen Utensils
- Mixing bowls,
- spatula,
- 9×13-inch baking dish,
- measuring cups,
- spoons
Ingredients
- 12 ounces cream cheese (softened)
- 1/3 cup powdered sugar
- 1 1/2 teaspoons vanilla extract
- 5 1/2 cups vanilla wafer cookies (about 3 full boxes)
- 1 1/4 cups sweetened condensed milk
- 18 ounces whipped topping (divided)
How To Make Vanilla Wafer Icebox Cake
1. Prepare the cream cheese mixture:
In a large mixing bowl, beat the softened cream cheese until smooth. Add the powdered sugar and vanilla extract, continuing to beat until fully combined.
2. Add condensed milk:
Gradually mix in the sweetened condensed milk, continuing to beat until the mixture is creamy and well combined.
3. Fold in whipped topping:
Gently fold in 12 ounces of the whipped topping into the cream cheese mixture until smooth and fully incorporated.
4. Assemble the cake:
On the bottom of a 9×13-inch baking dish, place a layer of vanilla wafer cookies, covering the entire surface.
5. Layer the cream cheese mixture:
Spread a portion of the cream cheese mixture evenly over the layer of cookies. Repeat layering with cookies and cream mixture until all are used, finishing with a layer of the cream cheese mixture on top.
6. Chill and serve:
Top the cake with the remaining 6 ounces of whipped topping. Cover and refrigerate the cake for at least 4 hours, or overnight, to allow the flavors to meld and the cake to firm up. Slice and serve chilled.
Special Note
One of the best things about this Vanilla Wafer Icebox Cake is its versatility. You can easily make substitutions or additions to suit your preferences.
For a chocolate version, you could use chocolate wafers instead of vanilla or even add layers of chocolate pudding in between the vanilla wafers.
Feel free to play with the flavors to create your own signature version of this no-bake dessert!
If you’re making this cake for a special occasion or want to prepare it in advance, it’s even better the next day.
The longer it sits in the fridge, the more the flavors meld together, making it even more delicious.

Nutrition Facts Of Vanilla Wafer Icebox Cake
| Nutrition | Amount |
|---|---|
| Calories | 290 |
| Fat | 18g |
| Carbohydrates | 31g |
| Protein | 3g |
| Sugar | 18g |
| Fiber | 0g |
| Sodium | 80mg |
(Note: These values are based on the ingredients listed and can vary based on the specific brands used.)
Serving Suggestions And Tips
1. Garnish Ideas: For an extra touch, top your Vanilla Wafer Icebox Cake with some freshly whipped cream, crushed vanilla wafers, or a dusting of cocoa powder. You can also add a drizzle of chocolate syrup or sprinkle some toasted coconut on top.
2. Add Fresh Fruit: For a fruity twist, consider layering in sliced strawberries, raspberries, or even bananas between the cookies. The fruit pairs beautifully with the creamy filling.
3. Flavor Variations: Want to mix things up? You can experiment with different cookie flavors such as chocolate wafers or even graham crackers for a new take on the traditional recipe.
4. Storage: Store leftovers in an airtight container in the refrigerator for up to 3 days. While it’s best fresh, it keeps well for a short time.
Hot Tips For Making The Perfect Vanilla Wafer Icebox Cake
1. Use Fresh Heavy Cream: Make sure to use fresh heavy whipping cream to get the best results. Older cream may not whip as well and could affect the texture of your cake.
2. Chill the Cake Overnight: For the best texture and flavor, let the cake chill overnight in the refrigerator. This allows the vanilla wafers to soften and the flavors to meld.
3. Add a Layer of Fresh Fruit: Enhance the flavor by adding fresh fruit like strawberries, bananas, or blueberries between the layers for extra sweetness and color.
4. Adjust the Sweetness: Taste your whipped cream mixture before assembling the cake. If you prefer a sweeter filling, add a little more powdered sugar or vanilla extract to suit your taste.
5. Garnish Creatively: Top your cake with crushed vanilla wafers, chocolate shavings, or a drizzle of caramel sauce for added visual appeal and flavor.
FAQs About Vanilla Wafer Icebox Cake
1. Can I use a different type of cookie in this recipe?
Yes! You can substitute vanilla wafers with other cookies such as chocolate wafers, graham crackers, or even chocolate chip cookies for a different flavor profile.
2. How long should I refrigerate the Icebox Cake before serving?
Ideally, refrigerate the cake for 4 hours or overnight. This allows the wafers to soften properly and the filling to set, resulting in the best texture.
3. Can I freeze the Vanilla Wafer Icebox Cake?
Yes, you can freeze the cake for up to 2 months. Wrap it tightly in plastic wrap and foil, then thaw it in the refrigerator for a few hours before serving.
4. Can I use a store-bought whipped topping?
While you can use store-bought whipped topping, homemade whipped cream gives the cake a richer, creamier texture and flavor. It’s worth the extra effort for the best result.
5. How do I make this cake even more decadent?
For an even more indulgent treat, try adding layers of chocolate ganache, peanut butter, or a salted caramel drizzle between the layers for added flavor depth.
Conclusion
This Vanilla Wafer Icebox Cake is the perfect dessert for anyone looking for an easy, no-bake treat that’s both creamy and indulgent.
I hope you enjoy making this Vanilla Wafer Icebox Cake as much as I do. It’s the perfect dessert for any occasion—simple, delicious, and always a crowd-pleaser.
With just a few ingredients and minimal effort, you can create a treat that feels special every time. If you give it a try, I’d love to hear how it turns out for you! Leave a comment below and share your thoughts.
Thanks for stopping by, and happy baking! Don’t forget to indulge in a little sweetness today!
Another Delicious Recipe You’ll Love
Miracle Whip Chocolate Cake || Here’s
100 Percent Whole Wheat Pita Bread Recipe – Homemade
7 Grain Wheat Bread – Hearty Delight
Homemade Apple Banana Nut Bread Recipe
Artisan Wheat Bread – A Home-Baked

Vanilla Wafer Icebox Cake
Equipment
- Mixing bowls
- Spatula
- 9×13-inch baking dish,
- Measuring Cups
- Spoons
Ingredients
- 12 ounces cream cheese softened
- 1/3 cup powdered sugar
- 1 1/2 teaspoons vanilla extract
- 5 1/2 cups vanilla wafer cookies about 3 full boxes
- 1 1/4 cups sweetened condensed milk
- 18 ounces whipped topping divided
Instructions
Prepare the cream cheese mixture:
- In a large mixing bowl, beat the softened cream cheese until smooth. Add the powdered sugar and vanilla extract, continuing to beat until fully combined.
Add condensed milk:
- Gradually mix in the sweetened condensed milk, continuing to beat until the mixture is creamy and well combined.
Fold in whipped topping:
- Gently fold in 12 ounces of the whipped topping into the cream cheese mixture until smooth and fully incorporated.
Assemble the cake:
- On the bottom of a 9×13-inch baking dish, place a layer of vanilla wafer cookies, covering the entire surface.
Layer the cream cheese mixture:
- Spread a portion of the cream cheese mixture evenly over the layer of cookies. Repeat layering with cookies and cream mixture until all are used, finishing with a layer of the cream cheese mixture on top.
Chill and serve:
- Top the cake with the remaining 6 ounces of whipped topping. Cover and refrigerate the cake for at least 4 hours, or overnight, to allow the flavors to meld and the cake to firm up. Slice and serve chilled.